You’ve been swooning over her style since her days on Laguna Beach.
How is it that she always looks so effortlessly chic and put together.
She’s your total style girl crush.
I’m talking about Lauren Conrad!
I’ve lost track of how many conversations I’ve had with my clients, girlfriends and biz besties, not just about Lauren Conrad’s style, but her stunning signature makeup look…the Cat Eye!
Part of the conversation usually goes something a little like this…
OMG! LC’s makeup always looks so gorgeous.
That winged liner is just EVERYTHING. I ssssoooo wish I knew how to do that!
Anytime I go near liquid liner I swear it ends up in place that it shouldn’t…don’t even ask me how.
Oh and don’t even get me started on trying to make both eyes look the same. LOL!
For the most part, I either ruin my makeup or end up with some weird, lopsided look that I try to cover with a strategic hairstyle!”
Does this sound familiar, lovely?
Let me start by saying that I totally sympathize!
I too have had my fair share of winged-liner meltdowns…typically in a panicked flurry, 5-minutes before I’m due to walk out the door for some super important event or meeting.
Well my gorgeous friend, today I’m spilling my ultimate winged eyeliner sparkly secrets AND…
How you can recreate Lauren Conrad’s signature look!
Here are just some of the reasons I seriously LOVE this look and why I know you will too:
- It’s simple, chic and timeless – yay!
- It’s super quick to create, especially once you get your liner technique down – double yay!
- It’s perfect for the busy gal that needs to go from office to cocktail party in a snap!
I LOVE that it only takes me roughly 7-minutes or less (on a normal day), to go from bare faced to boss lady, and ready to bounce out the door!
Here’s how you can bouncy out the door looking like you’ve had a visit from LC’s personal glam-squad..
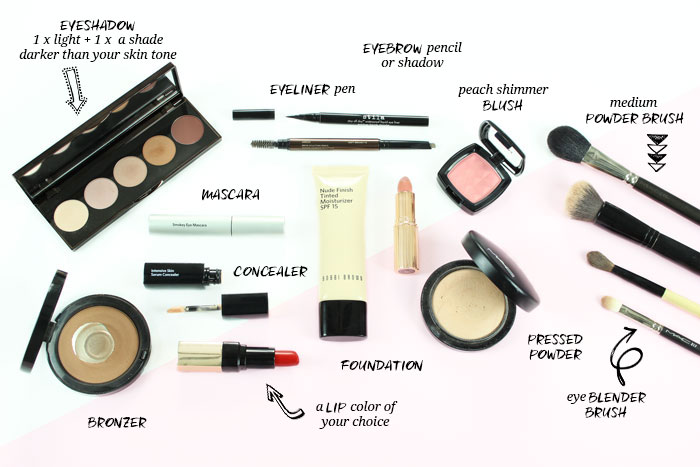
You will need:
Choose Your Own Makeup Adventure!
Prefer to use a tinted moisturizer or BB cream instead of a foundation? Go for it.
Don’t have the time…or the patience to apply eyeshadow? Skip it.
Not a fan of lipstick? Swipe on a coat of lipstick or lip balm instead.
Want to pump the glam up? Apply some fun flirty lashes or just a few individual lashes.
That’s the great thing about makeup – there are no rules. Choose products that work for your skin type and tone, along with your lifestyle.
The Products I Used:
Bobbi Brown Nude Finish Tinted Moisturizer SPF 15 (light tint) | Rimmel London Wake Me Up Foundation (103 true ivory) | Bobbi Brown Intensive Serum Concealer (cool sand) | MAC Cosmetics Prep + Prime Highlighter (radiant rose) | MAC Cosmetics Mineralized Skinfinish (medium plus) | Sephora Mineral Powder Brush (45) | Hourglass Brow Sculpting Pencil (soft brunette) | Urban Decay Eyeshadow Primer Potion (original) | Becca Cosmetics Ombré Rouge Eye Palette | MAC Cosmetics 217 Blending Brush | MAC Cosmetics 224 Tapered Blending Brush | Stila Stay All Day Waterproof Liquid Eye Liner (intense black) | Bobbi Brown Smokey Eye Mascara (black) | Bobbi Brown Bronzing Powder (golden light 1) | MAC Cosmetics 116 Blush Brush | NYX Blush (summer peach PB27) | Charlotte Tilbury Lipstick (bitch perfect) | Bobbi Brown Luxe Lip Color (Parisian Red 28) | Clinique Quickliner for Lips Intense (01 intense sassafras)
Press PLAY to watch the how to video:
My secrets to LC’s signature look:
[col3_2]:: It all begins at the baseline – apply your catty liner product of choice (more on that below), to the lash line first – indicated by the glitter line.
:: Map your wing – carefully sketch in your wing from the outer corner of your lash line, to the tail of your eyebrow – indicated by the pink line. The longer your wing, the more dramatic your catty liner will be.
I personally like to stop my wing at the socket line, for a soft and flirty day-to-day look.[/col3_2]
[col3_1]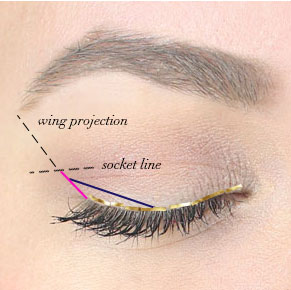 [/col3_1]
:: Shape it up – leaving approximately 2-3mm at the end of your wing, draw a line to connect the sketched wing (pink) to your baseline (glitter), creating a triangle – indicated by the blue line.
In my opinion, extending this line from the sketched wing to half or one third of the way along your baseline, looks best. That way, when you open your eyes, the triangle will line-up with your pupil or the outer edge of your iris (the colored part of your eye.)
:: Color it in – fill in the triangle (or area within the glitter, pink and blue lines) with your catty liner product.
:: Blend baby – thicken your baseline as necessary. You may like to blend where your baseline joins the triangle wing, by thickening the base band. Make sure you only add a little more thickness or product at a time.
Your wing should be thickest on the outer corner and get thinner as it moves towards the inner corner of your eye.
:: Step back – take a step back from the mirror and look a the big picture. Are your eyes even? Where do you need to balance things up? Then go back in and make your adjustments bit-by-bit if as need to. You can easily add more liner…but it’s a little trickier to take it away (as I’m sure you’ve experienced previously!)
:: Slow down speed racer – take your time creating your catty liner with small strokes. Seriously, I cannot stress this enough. As with anything, the more your create this look, the easier it becomes and the quicker you can do it. It’s probably not the best idea to try and recreate this look for the first time when you’re in a rush to go somewhere.
:: This is way too hard – my wings are still wonky! Love, I’ve got a failsafe trick you’ll adore…
The liner.designer by beautyblender will be music to your ears…or perfect wings to your cat eye!
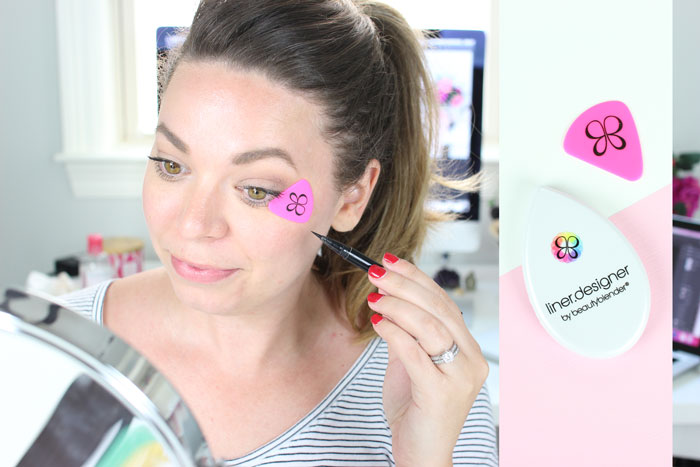
Simply warm-up the silicone shield in the palm of your hand.
Then stick the shield to your skin once you’ve lined up the straight edge of the tool, with your lower lash line and tail of your eyebrow.
No mess. No stress. Just a bunch of sparkly fun!
You can achieve the same thing with tape however, I’m not a fan.
Tape has a bunch of chemicals in the adhesive (which you don’t want on your face, let alone around your delicate eye area). It can also remove any makeup you’ve already applied. Boo.
What to do if you’re not ready for liquid eyeliner:
Liquid eyeliner isn’t the only way to achieve Lauren Conrad’s signature look.
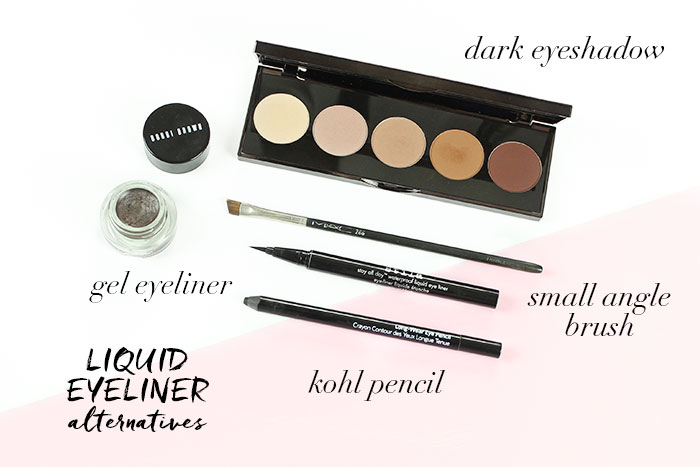
If you’re still not comfortable playing with liquid liner, try using one of the following:
- a gel eyeliner applied with a small angled brush,
- a kohl pencil, or
- a dark eyeshadow for a softer look.
Then follow the simple application techniques shown in the video.
You made a catty liner boo-boo! Now what?:
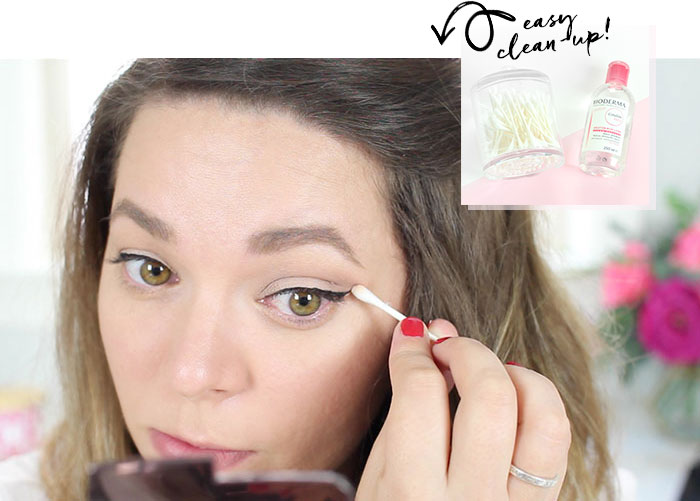
Cotton tips and an erasing solution will be your new bestie.
Try either micellaire water, makeup remover or eyeshadow primer.
Just note, the eyeshadow primer will only work if you primed your eyes with it prior to applying eyeshadow.
Be sure not to rub or apply to much liquid to the end of your cotton swap.
Simply hold the cotton tip with your chosen erasing solution on the end, onto the boo-boo and gently roll the cotton tip back on itself – barely touching the skin.
If one or two gentle rolls don’t make the clean-up cut, simply go back in with a new cotton tip until you’ve cleaned up the entire area.
And that’s how you recreate Lauren Conrad’s signature look!
Need some help?
Want to share your LC makeup pics or chat about makeup like besties?
Yeah you do!
Pop your name and email address into the sign-up box below this post and I’ll pop into your inbox with all the details on how you can join my brand sparkly new Facebook group…oh and you’ll also receive a free copy of my morning makeover eBook, Mirror Mirror.
I hope you found this tutorial helpful and picked up some super sparkly secrets to creating your catty liner with blissful ease!
I can’t wait to giggle and toss glitter with you, over in the Facebook group!
With love,